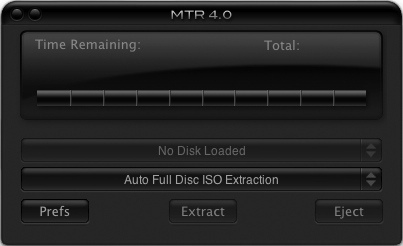
How to Use MacTheRipper to Rip DVDs on Mac
This article will teach you how to use MacTheRipper to rip DVD on Mac step by step. Here takes MacTheRipper 4 for example. Since MacTheRipper is hard to download, you can see how to get MacTheRipper 4 or get a better DVD ripper for Mac.
Ripping Full DVD Folders to Mac
MacTheRipper provides your with 3 modes to rip DVD on Mac: Auto Full Disc Extraction mode, Auto Full Disc ISO Extraction mode and Full Disc Rip And Rebuild mode. Here takes Auto Full Disc Extraction mode for instance.
- 1. Launch MTR, and set the extraction type to Auto Full Disc Extraction.
- 2. Insert the DVD disc you want to rip movies from. MTR will detect and scan titles in the disc.
- 3. Click Extract to starting ripping DVD on Mac with MacTheRipper.
- 4. The DVD will be saved as a folder on Mac.
Note that If RCE Region Protection was detected, you will be prompted to select the "RCE Region" number. To make a region-free video. The RCE Region should be set to the region the DVD was purchased in. For example, US is 1, while Europe is 2.

Ripping Full DVD to ISO
Note that If RCE Region Protection was detected, you will be prompted to select the "RCE Region" number. To make a region-free video. The RCE Region should be set to the region the DVD was purchased in. For example, US is 1, while Europe is 2.
Ripping and Rebuilding DVD
Note that If RCE Region Protection was detected, you will be prompted to select the "RCE Region" number. To make a region-free video. The RCE Region should be set to the region the DVD was purchased in. For example, US is 1, while Europe is 2.
Tags: mactheripper guide, how to use mactheripper, mactheripper tutorial
